

This technique is a very quick and dirty approach to creating a pile of stuff. The downside using this technique is due to the fact that particles are generally round and usually stuff is not round, causing segments of your geometry to intersect with other objects.
Step 1
Set up a nParticle emitter: In the FX Menu select nParticles > Create Emitter
Step 2
Adjust the following Attributes of the emitter1:
- TranslateY = 9
- Rate (Particles / Sec) = 20

Step 3
Configure the nParticle (“nParticleShape1”) Shape -
- Self Collide = true
- _Stickiness = 1.0

Step 4
Activate the ground plane in “nucleus1”. This will create an invisible plane to collide with the particles.
- UsePlane = true

Alternatively, you could create a poly plane as ground plane to be used as a particle collider.
Step 5
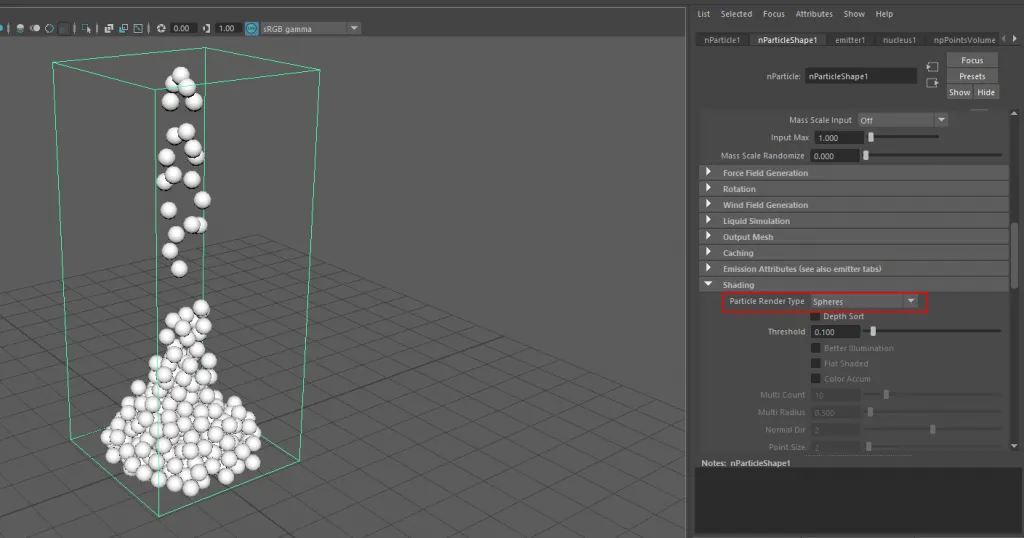
Set the Playback Range to 1-500 and view how the Particles are piling up.
You can switch the Particle Render Type to Spheres to get a better idea of how the Pile will look like.
Adjust the particle & emitter settings to fit your needs.
Step 6
I created a couple of basic objects, that I will use instead of the Particles.
Select the particles and all the objects you want to use as geometry replacement. nParticles > Instancer

Now all the Particles should look like the first object in you selected. (in my case cubes)
Step 7
Select the Particles again go to Add Dynamic Attributes and click the General Button.
In the Add Attribute dialog enter for the Long name = objIndex PP, enable Per particle(array) and click Ok

Step 8
Back in the ParticlesShape Node open “Per Particle (Array) Attributes” RMB on “Obj Index PP” > Creation Expression

In the Dialog add the following Expression:
objIndexPP = rand(0,3)In essence, this means that for each particle a random number between 0 and 3 is going to be chosen.
Step 9
Back in the Attribute Editor go to Instancer(Geometry Replacement) > General Options > Object Index select ObjIndex PP

Restart the playback to refresh all particles.
(optional) Step 10
Now all the objects are looking kind of stacked up and look identical. To make it visually more interesting you can activate ”Rotation“.

Go to Instancer(Geometry Replacement) > Rotation Options > Rotation and select rotationPP

Step 11
You can modify and place your initial geometry on its own layer and hide that. (Especially if your objects appear too big, you could scale them down etc.)

About Neal Burger
Neal Burger is a successful entrepreuner. He is the founder of Acme Inc, a bootstrapped business that builds affordable SaaS tools for local news, indie publishers, and other small businesses.