

We will be taking a look at how you can light your scene using the “infinite white background” look. This look is commonly used to present technical stuff or single objects. In my example, I am going to use a model of a dragon statue. First, we will be taking a look at how to achieve the effect using only Final Gathering and after that, we will take a look at using ambient occlusion as a light source.
Scene Setup
Step 1
Create a Poly Plane with a white lambert and import your object.
Step 2
Create a Camera. Set the Environment> Background Color to White  Camera Background Color Settings
Step 2
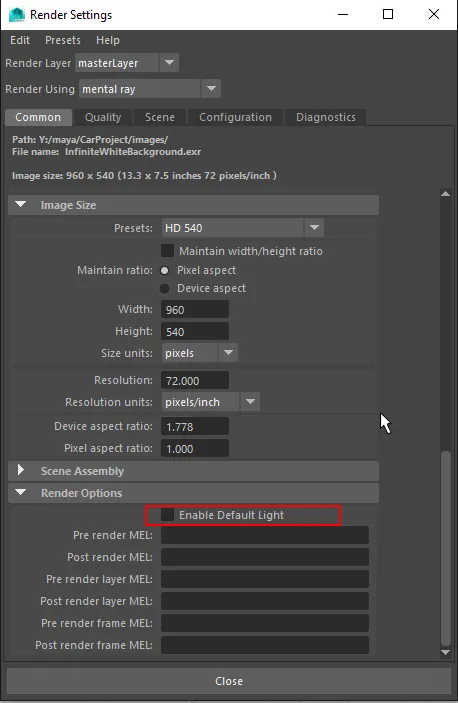
For the Final Gather technique, we will not use any lights. The default light would only cause unwanted side effects. To disable the “default light”, open the Render Settings in the “Common” tab open the panel “Render Options” and remove the check at “Enable Default light”.
Final Gather
Setup
The Final Gather Effect will use the environment color of the camera to light the scene. You only need to activate Final Gather and you will see the result.

Result
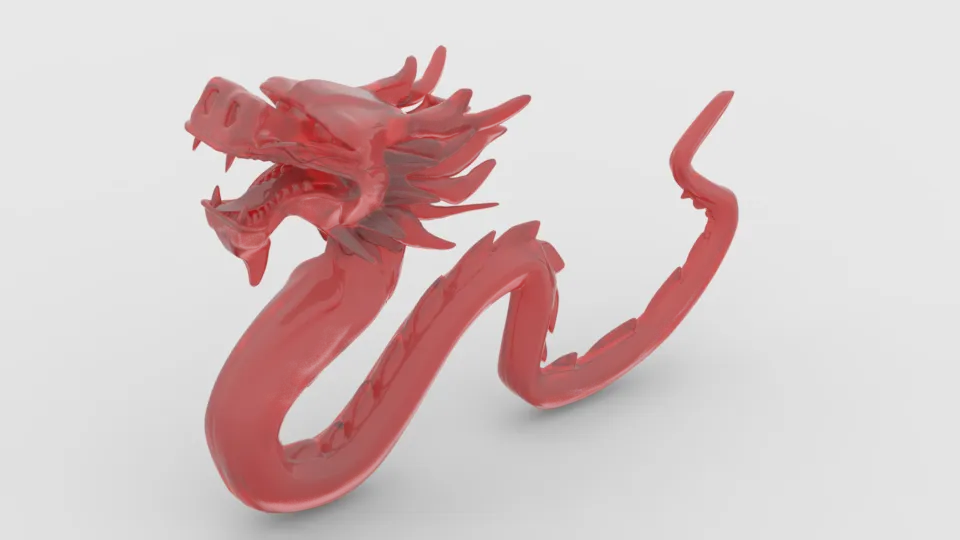 Final Gather Render, Render time 2:34min
Ambient Occlusion Light Source
Step 1
Create an Area Light. In the Attribute Editor under mental ray > Area light, activate Use Light Shape.

Step 2
Connect to the Attribute “Custom Shaders > “Light Shader” a “mib_amb_occlusion” node.

Step 3 (optional)
To increase the render quality you can adjust the attributes ”Samples” and ”Max Distance“.
Result
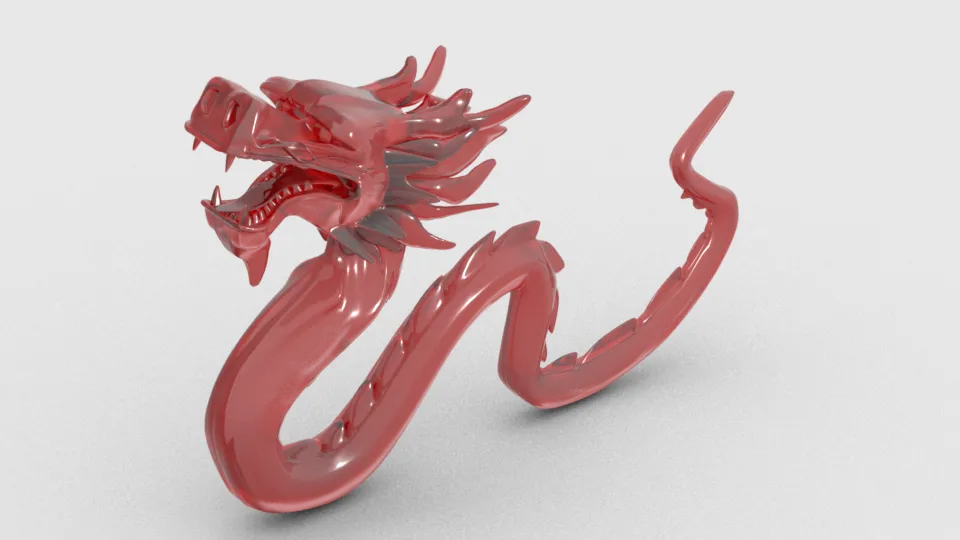 Ambient Occlusion Render, 4:35min

About Neal Burger
Neal Burger is a successful entrepreuner. He is the founder of Acme Inc, a bootstrapped business that builds affordable SaaS tools for local news, indie publishers, and other small businesses.