

The Bridge-Tool creates a bridge between edges or faces. To use the tool you need to select on both sides the same number of edges or faces. By default you get something like this:
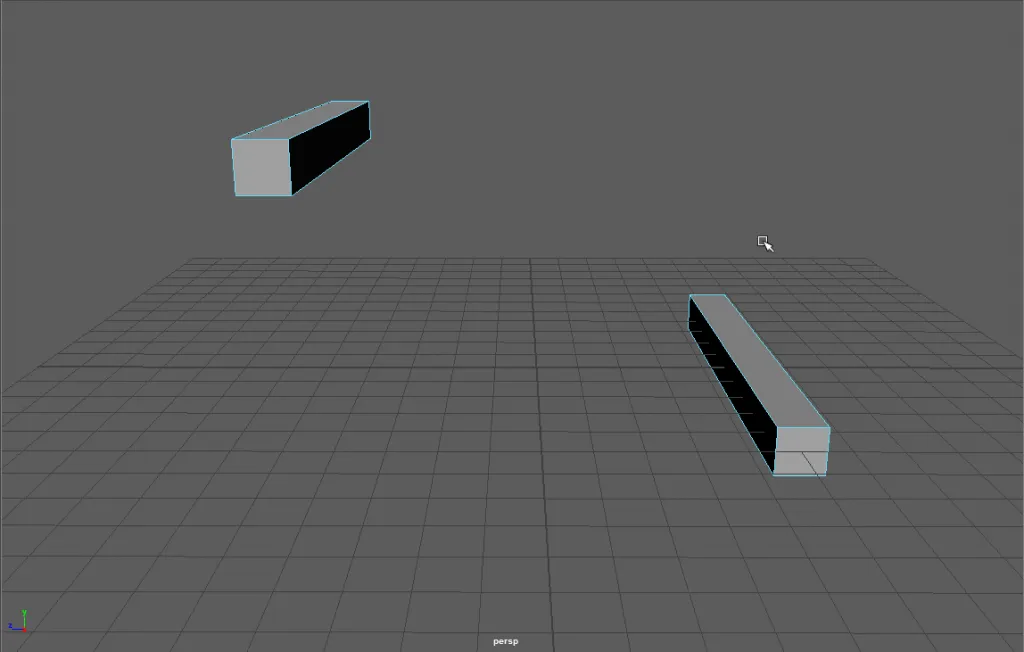 Two cubes combined into a single object
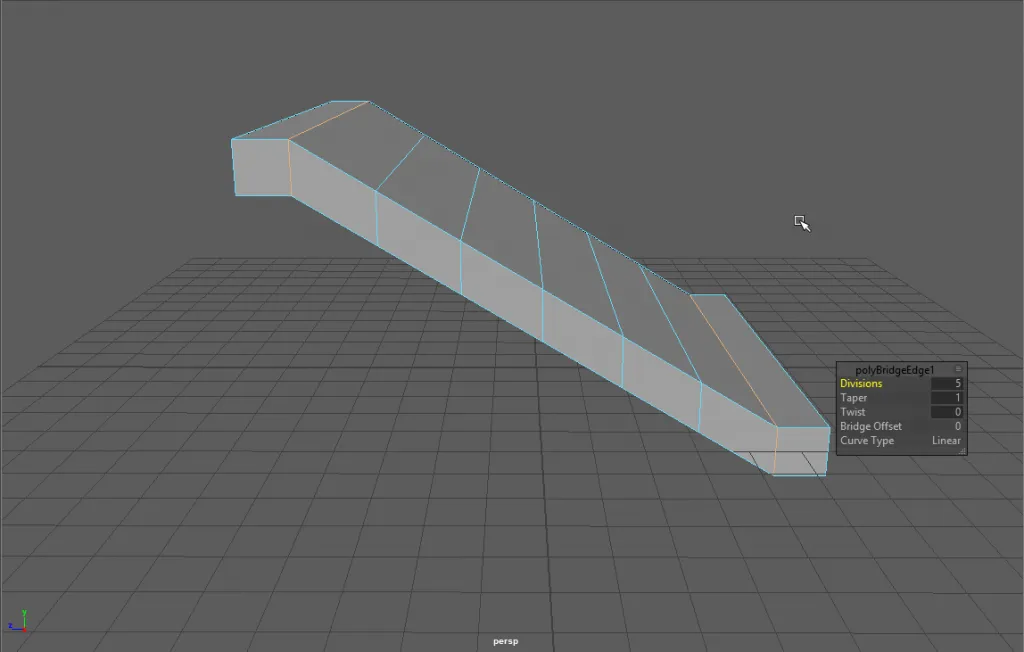 Linear Blend the default settings
You can change the default Curve Type Settings to Blend and you will get something like this:
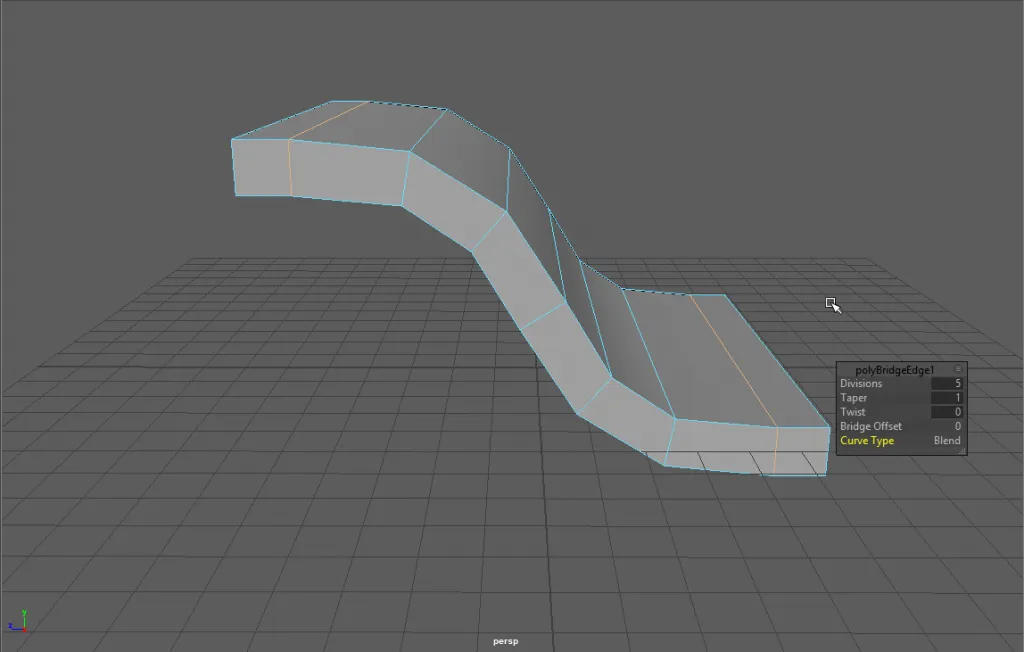
In the Blend mode you do not have any of control how the blend will occur. You need to create a Bridge with the options set to “Smooth path + curve”.
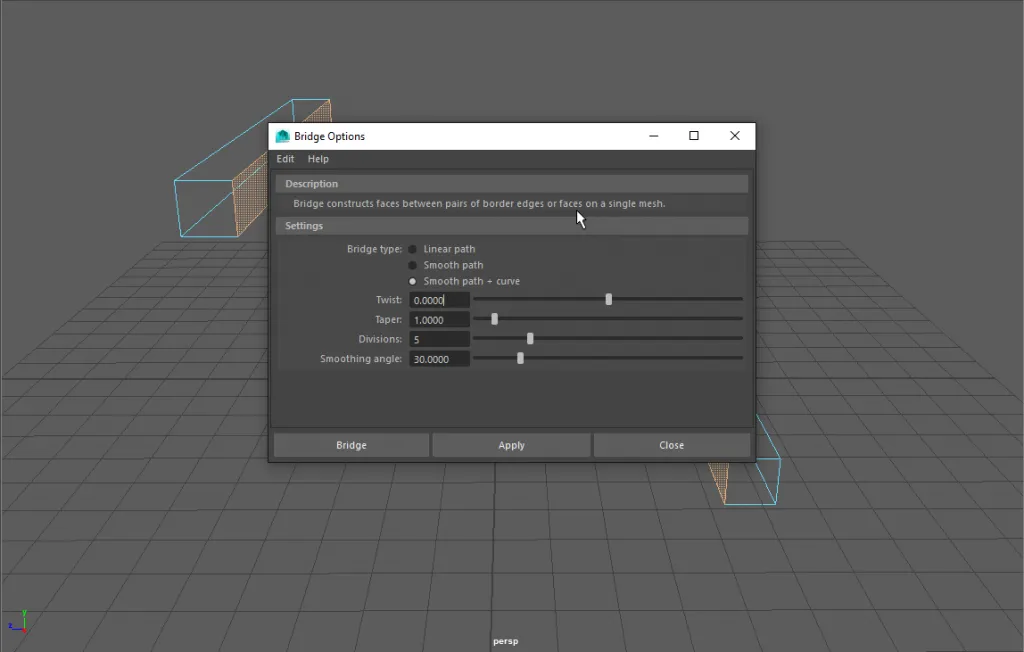
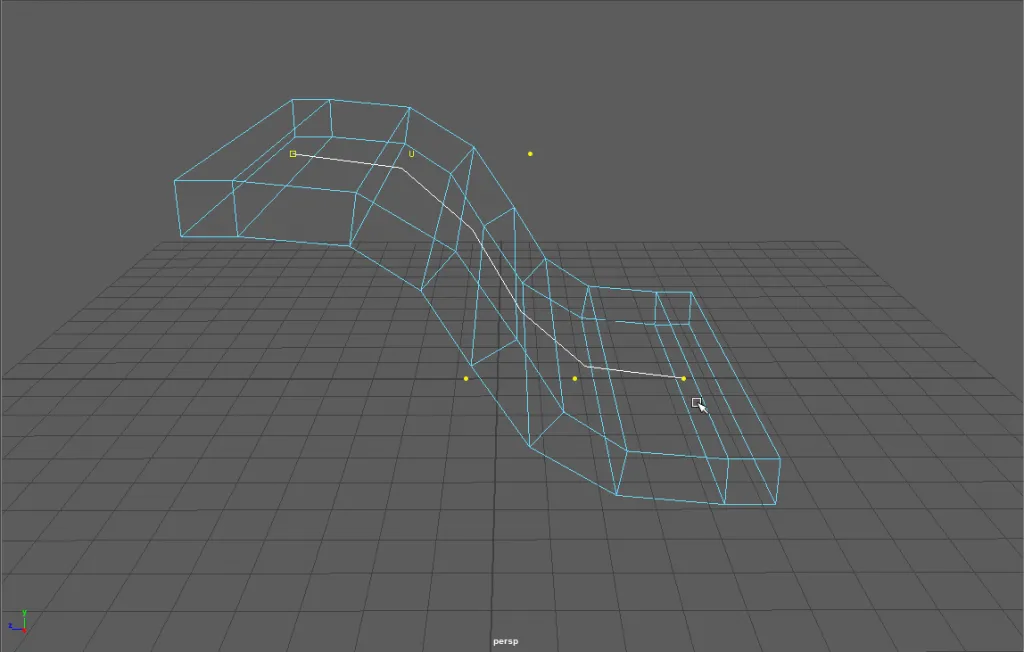
Initially, the bridge will look identical to the “Curve Type: Blend” or “Bridge type: Smooth path”. You need to switch to “Wireframe”-Mode then you can select and adjust the control curve.

About Neal Burger
Neal Burger is a successful entrepreuner. He is the founder of Acme Inc, a bootstrapped business that builds affordable SaaS tools for local news, indie publishers, and other small businesses.